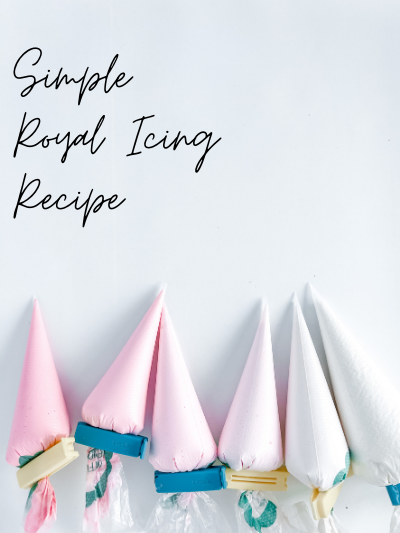
Every cookie decorator needs a good royal icing recipe for their cookie creations. My go-to royal icing recipe uses meringue powder which allows it dries hard giving you the ability to get creative with decorating! While it is pretty simple to make, it is probably one of the hardest icings to perfect.
The challenge usually comes with finding the right consistency for the design you are trying to achieve. I will walk you through my method for making the simplest royal icing recipe with meringue powder to help make all of your cookie decorating dreams come true!
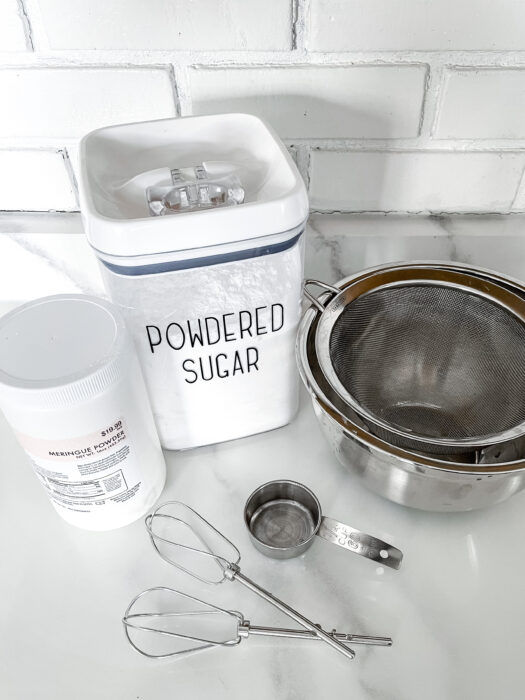
Ingredients for Royal Icing
In this basic Royal Icing Recipe, I only use 3 main ingredients - Confectioners Sugar, Meringue Powder, and Water. Though there are many different alternatives for meringue powder (such as egg whites or egg white powder), I prefer meringue powder because it is more stable and consistent.
Pro Tip: I also add a small amount of clear vanilla extract for a little flavor. I also add a touch of corn syrup to help the icing dry shiny! Both the vanilla extract and the corn syrup are optional and not necessary for this recipe.
Confectioners Sugar
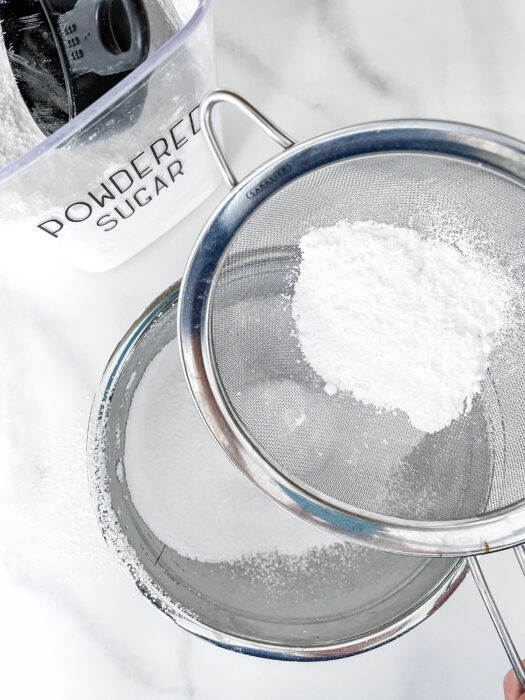
Confectioners sugar (or powdered sugar) is the bulk of most icing recipes, including this Royal Icing. Though I confess I get lazy about this on occasion, but sifting your powdered sugar is an important step. This will help ensure that you remove any lumps in the sugar and give you smoother icing. Though lumps may not always be visible when making the icing, you will know you have them when they get stuck in your piping bag!
Meringue Powder
While powdered sugar is the bulk of the royal icing recipe, meringue powder is the key. Without the meringue powder, your icing will not thicken much and you will be left with more of a glaze that does not fully harden.
In my recipe, I typically use approximately ½ tablespoon of Meringue powder per 1 cup of powdered sugar.
I like using Wilton meringue powder (easy to get from Jo-Anne's, Michael's, Amazon, and Walmart). The Hobby Lobby brand called Sunny Side Up Bakery also works great!
Water
Now we have the water, the glue that holds the Royal Icing together. One of the most important things to remember when making royal icing is that a little water goes a LONG way. After I add the initial ¼ cup of water to the recipe, I never add water in large amounts to the icing. It is always easier to add a little more water than to have to add more powdered sugar to thicken the icing back up.
Pro Tip: Use a spray bottle to add water to the Royal Icing when you are getting close to the consistency you are trying to achieve. This helps reduce the chance of adding too much water!
How to Make Royal Icing with Meringue Powder
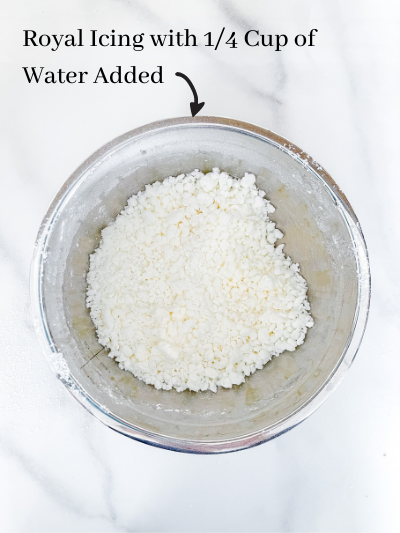
First things first, measure out your Confectioners sugar. I like to use a scale to be as consistent as possible. Once you measure your 4 cups of confections sugar (about 450g) sift into a large mixing bowl. Then go ahead and add your meringue powder through the sifter as well and top it all off with the first ¼ cup of water (preferably room temperature or lukewarm water).
How to Mix Your Royal Icing
Royal Icing can be mixed with either a stand mixer or a hand mixer. If I am making one batch or less, I typically use my hand mixer (I am way too lazy to drag my stand mixer up from the basement for a little bit of icing!). But when I do larger batches, the stand mixer is much more efficient and worth the effort.
No matter which you choose to mix your icing, you will have to mix on low. You can get the hand mixer up to a medium speed because it is less powerful than a stand mixer. If you beat the royal icing at too high of a speed, you will get air bubbles in your icing. Trust me it is not fun to pop tons of air bubbles when you are decorating your cookies!
Adding Water to Your Royal Icing
When you begin to beat the powdered sugar, meringue powder, and initial ¼ cup of water, the mixture will be very clumpy, still very dry looking, and slightly yellow.
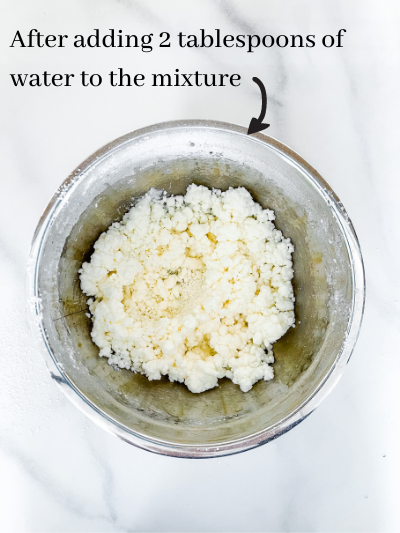
Continue to add water, a little at a time. I typically add 1 tablespoon at a time (only up to about 2-3 tablespoons). If you're not sure, always add less water than you think. It is easy to add more water, but more of a pain to fix if you make the royal icing too thin.
After adding another 1-3 tablespoons of water to the icing, the mixture will start to clump together even more. You should see large clumps, it will look a bit more liquidy (though still dry overall), and have a yellow tint.
I do not like to add more than ¼ cup + 3 tablespoons of water to the icing. Once I add that much water, if the royal icing is still clumpy, I will add teaspoons of water at a time. Less is more!
To be on the even safer side, use a spray bottle! This will help to control how much water you add at a time.
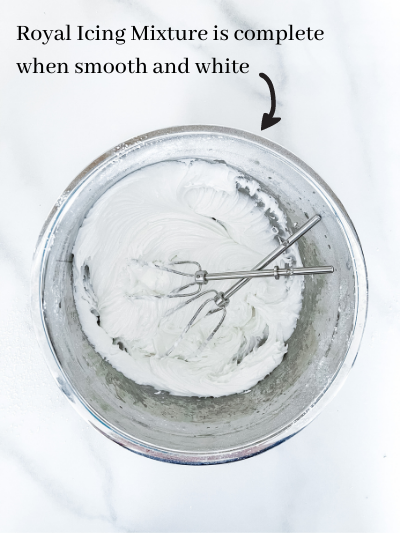
Once the mixture is cohesive and there are no more bumps, continue to beat the icing on low for another 2-3 minutes. It will be smooth and look much more white than yellow at this point.
I like to mix the royal icing to be somewhat thick and thin out the icing in small amounts as I mix colors. Cover the mixture with a wet paper towel to keep the icing from drying out (I like to put my beaters in the bowl as well so they don't dry out and easy to use if I need to mix up a bit more icing)!
Soft Bite Royal Icing Recipe
To give your royal icing an extra shiny coating and a nice soft bite, you can add a touch of corn syrup. This is a completely optional step, so if you do not have corn syrup, do not stress on this. Follow the same instructions as I have explained above, however, after you add the initial ¼ cup of water and mix, add in 2 teaspoon of corn syrup (and 1 teaspoon of clear vanilla extract if you would like some flavoring). Continue to follow the instructions from there and you will have royal icing with a soft bite and nice shine when it dries!
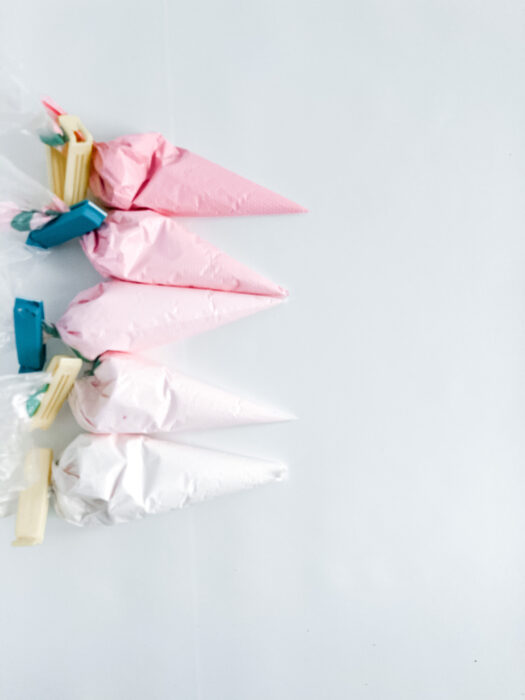
Mixing Color into Royal Icing
Before you start dying your Royal Icing, I would recommend having a plan of what colors you will need and what consistencies you need.
For a rule of thumb, you will need thinner icing for flooding, a medium icing for the outline, and a medium to thick consistency for detail work.
When I mix my icing, I always start with the lightest color - which in many cases is white. I recommend getting AmeriColor Bright White dye. Though the royal icing looks white when you are done mixing it up, when decorating it will look just slightly off-white. Using white dye will give it a sharp white look!
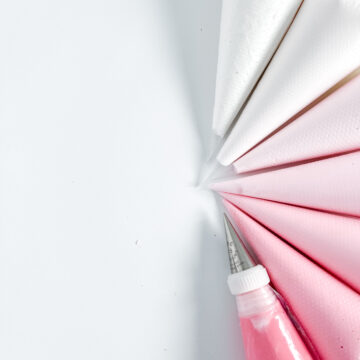
Start by scooping out a portion of the royal icing from the large bowl into a smaller bowl. Add just a few drops of food coloring of your lightest color and mix.
I like using gel paste food coloring. AmeriColor is my favorite brand, but Wilton, as well as Sunny Side Up Bakery (Hobby Lobby), also work great! Just make sure whatever food coloring you use is water-based. Oil-based coloring will ruin the royal icing.
Colors will continue to develop and darken/deepen over the next few hours. When you are making really dark colors (i.e. navy, red, black) after you add the food coloring, you can cover the bowl with a wet paper towel and let sit for an hour or so to let the color darken. This is not a necessary step, but will help you to see if you achieved the right color!
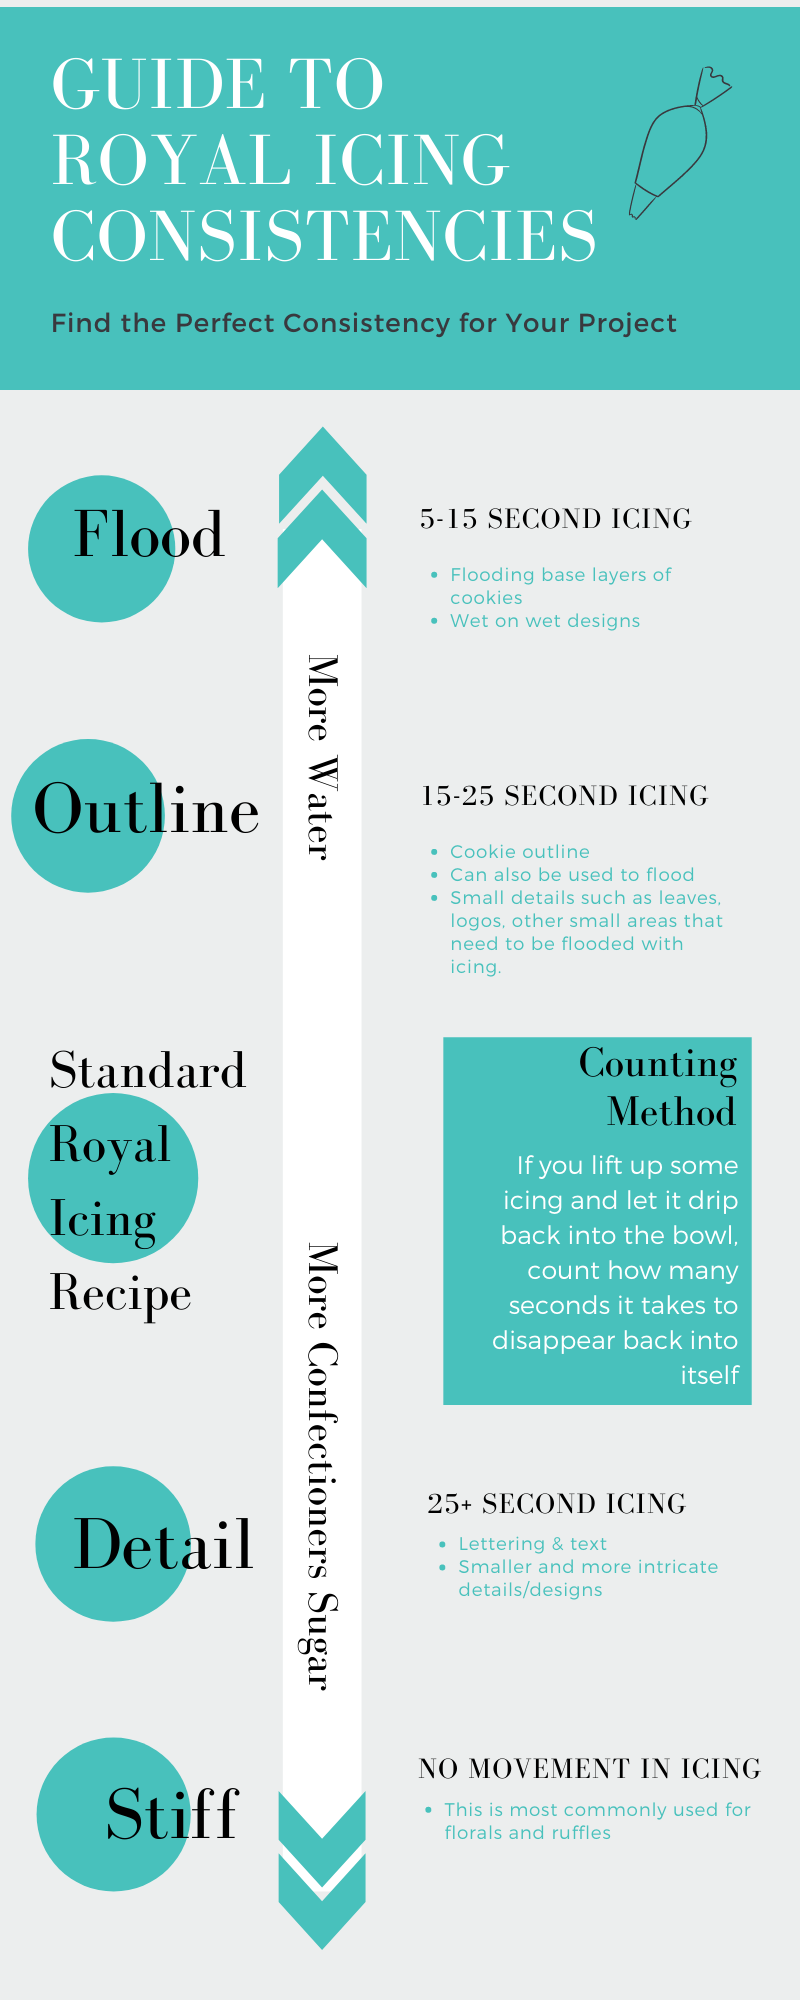
Royal Icing Consistencies
Once you get your small bowl of royal icing to your desired color, add water (with the spray bottle or just drops at a time) until you achieve the thickest consistency you need for that color. For example, if you only need an outline and flood for a color, add enough water to get to the outline consistency - add what you need to a piping bag and tie, rubberband, or clip the end of the bag. Then add more water until you get to flood consistency and add that to a piping bag.
If you want to learn more about flood, medium, and stiff consistency royal icing, check out my post here!
Continue the process with the second lightest color, then third, and so on...
In many cases, you can use the same small mixing bowl (for example if you first do white, then pink, then red) and you will save yourself a lot of dishes!
How to Store Royal Icing
You can keep royal icing made with meringue powder at room temperature for up to 1 week (note: if you use real eggs for your icing, it will keep for much less than 1 week). You can keep it in the piping bag, sealed in an airtight container or Ziploc bag. If you are keeping the icing directly in a container, put a piece of plastic wrap over the top, and then seal with a lid. When you want to use the icing again, make sure to re-mix or if it is in a piping bag, massage the bag to combine. If you do not do this, the water will separate and it will not work well for decorating.
I recommend putting the royal icing in the refrigerator. You can package it the same as mentioned above (in piping bags or bowl), and it will keep for about 2 weeks. This is best for when you know you will be using the icing again soon.
If you want to save the royal icing for longer, package it the same as above, and freeze for up to 6 months. Let the royal icing come to room temperature before using and make sure to stir or knead the piping bag before use.
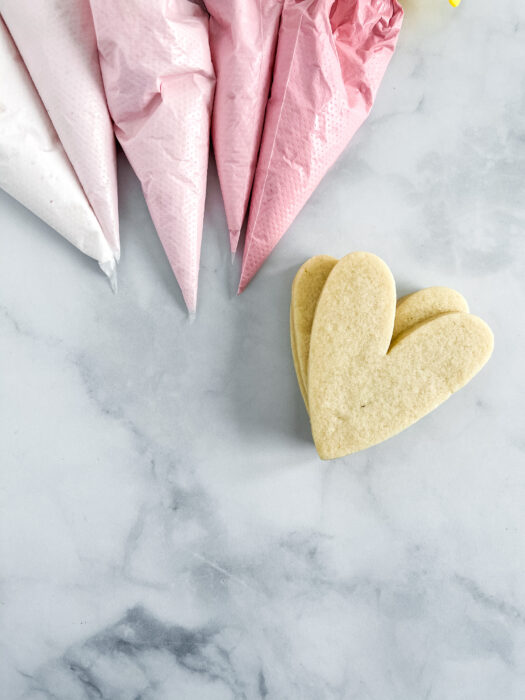
And Now the Best Part...
It's time to decorate your cookies! You will want to use a no-spread recipe that does not rise - check out my classic Sugar Cookie Cut Out Recipe. If you want to learn more about royal icing, head over to my Ultimate Royal Icing Guide! I also have some information on how to quickly dry royal icing and how to transport decorated cookies.
Happy Decorating and remember to tag @The_Frosted_Kitchen in any of your amazing cookie creations!
Classic Royal Icing Recipe
Ingredients
- 4 Cups Powdered Sugar 450g
- 2 Tablespoons Meringue Powder +½ teaspoon
- ¼ Cup Water + 1-3 Tablepsoons
Instructions
- Measure 4 cups (450g) of powdered sugar and sift into a large bowl.
- Sift in 2 tablespoons + ½ teaspoon of meringue powder into the powdered sugar.
- Add ¼ cup of lukewarm water and beat with a hand or stand mixer on low for about 30 seconds. The mixture will be very dry and have many small clumps.
- Add 1-2 tablespoons of water (one at a time) and continue beating on low for another 30-60 seconds. The mixture will start to moisten and large clumps will form and it will appear slightly yellow.
- Gradually add water ½ - 1 teaspoon at a time (or use a spray bottle to better control how much water you are adding). Continue beating on low until the icing gets smooth, turns white, but should still be quite thick.
- Cover the completed Royal Icing with a wet paper towel to keep it from drying out when you are mixing colors.
- Plan what colors and consistencies you will be using.
- Spoon out the royal icing into a smaller bowl for your first color (start lightest and work your way to the darkest colors) Add food coloring in small amounts at a time until you achieve the desired color.
- Using the spray bottle (or drops of water at a time) get the dyed icing to the thickest consistency you will need for that color. Add a portion of this to a piping bag and tie shut.
- With the remaining icing of the first color, add more water to achieve the next thickest color, and continue this process until you have all of the first color secured in piping bags.
- Continue this process with each color until you have all of the royal icing consistencies and colors you need for your project.
- One batch of royal icing should decorate approximately 24 medium (3") cookies. This could vary depending on how large your cookies are or how much detail icing you need for your design.
- Any extra royal icing can be stored in an airtight container in the refrigerator for a few weeks or up to a few months in the freezer. To use again, bring back to room temperature and stir very well. If you have extra icing in piping bags you can also keep in the refrigerator or freezer in a ziplock bag.