With Valentine’s Day right around the corner, it seems like the perfect time to share a few heart cookie decorating ideas. These ideas are all made from royal icing and are easier than you may think. Impress your Valentine (or Galentine!) with one of these fun heart-shaped cookies.

Disclaimer: This post may contain affiliate links, meaning I may get a small commission if you decide to make a purchase through my links at no cost to you.
Jump to:
Supplies You Will Need
In this list, I have compiled a list of the ingredients and supplies you will need for ALL of these cookie designs. If any specific design needs a particular ingredient or supply, it will be notated in that section.
- Sugar Cookies Recipe: You will need your favorite sugar cookie recipe. However, please make sure your recipe makes a flat cookie with sharp edges. There are many classic sugar cookie recipes that rise in the center and slope towards the edges. This style of cookie (while delicious) does not lend itself well to royal icing decorating as the flood icing will run down the cookie and drip over the edges. My recipes are specifically designed for royal icing decorating so you can try my classic sugar cookie recipe, red velvet cut-out cookies, chocolate chip cookie cut-outs, or brown sugar cookie cut-outs.
- Royal Icing Recipe: Again, you can pick your own royal icing recipe here. If you are in need of one you can check out my simple 3 Ingredient Royal Icing Recipe which is made with meringue powder.
- Food Coloring: I recommend using gel food coloring for dying royal icing. You get sharp vibrant colors. Make sure whatever dye you use is water-based and not oil. I love the Americolor brand but you can also buy them in your local craft store or even Amazon.
- Piping Bags: An essential tool for royal icing decorating. They are simply the bags you put your icing into in order to decorate your cookies with precision.
- Heart-Shaped Cookie Cutters: Any style of hearts will work!
- Cookie Scribe: A tool that allows you to spread out the royal icing evenly across the top of the cookie. If you don’t have one, a toothpick will work fine too!

Decorating with Royal Icing
If you are new to royal icing, I recommend reading my Ultimate Guide to Royal icing Cookie Decorating as this breaks down everything you need to know about this style of decorating.
However, for a quick summary, royal icing is a type of frosting that creates a smooth and flat surface and then dries hard. The benefits of royal icing are that you can adjust the thickness of the icing and you can achieve very detailed designs as well.
To adjust the thickness of your icing, you either add more or less water. Here are the terms I use for my different royal icing thicknesses.
Flood Icing: This is the thinnest royal icing and is used as the base of most royal icing cookies. When mixing the icing, if you lift some icing on your spatula and drizzle it back into the bowl, it will take somewhere from 5-15 seconds to settle smoothly back into the bowl.
Outline/Medium Icing: This is slightly thicker than flood icing and can be used to outline your cookies (before the flood icing) or for small designs such as logos, block letters, stripes, etc.. Using the same drizzle trick, this icing will take 15-25 seconds (and sometimes a little shake of the bowl) to settle smoothly.
Detail Icing: The next type of icing we’ll discuss is detail consistency. This is used for lettering/text and other small details like leaves and vines. You can also outline cookies with it as well. This icing takes at least 25+ seconds to settle back, and it may never settle back completely.
Stiff Icing: This icing is super thick and commonly used for florals, ruffles, or anything that you do not want to see any movement with. It needs to be thin enough to go through a piping tip but should be so thick that it won’t move on its own once piped.
8 Cute Heart Decorating Ideas
Now let’s get to the fun part, it’s time to decorate your Valentine's Day cookies. Make sure your cookies are completely cool before decorating them with royal icing.
Conversation Hearts
While maybe the most iconic Valentine’s Day candy, the original conversation hearts are not my favorite as I find them to taste a bit chalky. Enter these adorable conversation heart cookies! You’ll now have super tasty cookies and even better, the messages can be personalized!
Additional Supplies:
- Red Edible Marker (however you can use detail consistency red icing and pipe out your text too, though this is a bit more challenging)
- Icing Styles: Outline and Flood consistency icing for each colored heart you choose to create.
Process:
- Outline the cookie with the outline consistency royal icing.
- With the same color, fill in the outline with the flood-consistency icing, starting at the edges and working your way in.
- With your cookie scribe or toothpick, spread out the flood icing evenly across the top of the cookie. Allow the cookie to dry completely. Depending on your royal icing recipe, this could take anywhere from 8 hours to overnight.
- Using the edible pen, write your messages across the center of the cookie in uppercase text.

Polka Dots
- Additional Supplies: None!
- Icing Style: Outline and flood consistency in red. Outline consistency in pink and white.
Process:
- Outline the heart cookie with the red outline consistency icing.
- Fill in the base of the cookie with the red flood icing.
- Spread out the flood icing with your cookie scribe to cover the entire top of the cookie.
- While the base is still wet, gently pipe dots in pink and white around the entirety of the cookie. You can spread them out or make them as close together as you prefer. Let dry!

Mini Hearts
- Additional Supplies: None!
- Icing Style: Outline and flood consistency in white. Outline consistency in red.
Process:
- Outline the cookie with the white outline consistency icing.
- Fill in the base of the cookie with the white flood-consistency icing.
- Pipe one large dot on top of the flood icing.
- Using your cookie scribe, drag it through the center of the dot to create a heart shape.
- Let dry!

Star Tip
- Additional Supplies: Star piping tip (Wilton #32)
- Icing Style: Stiff icing in pink, red, or white.
Process:
- Put the star piping tip in the base of a piping bag and cut a hole for the tip to come through.
- Fill the bag with stiff icing.
- Pipe stars around the entire heart.
- Let dry!

Simple Marbled Heart Cookies
- Additional Supplies: None!
- Icing Style: Outline and flood consistency icing in pink. Flood consistency icing in red.
Process:
- Outline the cookie with the outline consistency pink icing.
- Fill the center of the cookie with pink flood icing and spread it around to cover the base of the cookie.
- Immediately, add some lines and squiggles of the red flood-consistency icing around the cookie.
- With a cookie scribe, swirl around the icing to achieve a marbled effect.
- Let dry!

Stripes
- Additional Supplies: None!
- Icing Style: Outline and flood consistency in pink and red.
Process:
- Outline the top of the heart in pink.
- Fill in the outline with the pink flood icing.
- With the red outline, pipe a line under the pink and connect it up to the pink section.
- Fill in that section with the red flood icing.
- Continue the process down the heart until it's covered in stripes.

Sprinkles or Glitter
- Additional Supplies: Your favorite Valentine’s Day sprinkles or edible glitter.
- Icing Style: Outline and flood consistency in red, pink, or white.
Process:
- Outline the cookie with outline consistency icing.
- Fill in the center of the cookie with the flood icing, starting with the edge of the cookie and working your way in.
- Gently add the sprinkles or glitter to the top of the cookies while still wet.
- Let Dry!

Simple and Classic
- Additional Supplies: None!
- Icing Style: Outline and flood consistency icing in red, white, or pink.
Process:
- Outline the cookie with the outline consistency icing.
- Fill in the center of the cookie with flood-consistency icing.
- Spread the icing around with a cookie scribe to fill in the base of the cookie.
- Let dry!

Drying Time
Using my royal icing recipe, it usually takes about 8 hours for the cookies to fully dry. I recommend letting them dry overnight to be sure they are fully dry before storing. Let them dry on a baking sheet, wire cooling rack, parchment paper, or wax paper.
Variations
I chose to do all of these Valentine's Day cookies in the standard red, pink, and white color schemes. However, if you prefer different colors, feel free to get creative!
Storage
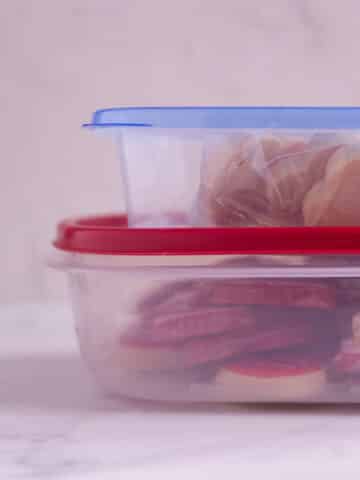
You can store decorated cookies for up to a week in an airtight container. I love using this type of container because they are large and flat so you don’t have to stack too many cookies on top of each other.
For longer-term storage, keep the cookies in an airtight container and freeze them for up to three months. When you remove them from the freezer do NOT open the lid. Allow it to come to room temperature before moving the lid and serving. Read more about all of the tips and tricks for storing decorated cookies and extra royal icing!
Related
Learn more about royal icing:
Pairing
Check out some other royal icing tutorials:
