It’s finally the best football day of the year the Super Bowl! While I do love the action of the game and the (sometimes) funny commercials, there is no question that the food is the best part. These football sugar cookies are a perfect addition to your Super Bowl Party. They are easy to make and you can customize the colors for your favorite football team!
These Super Bowl Cookies are made with a sugar cookie base and decorated with royal icing and royal icing transfers. I will show you step by step how to decorate these adorable football sugar cookies!
Sugar Cookie Recipe
You can use any sugar cookie recipe that you prefer. Though when you decorate with royal icing, you need to make sure your cookie is flat and does not rise when baking. Otherwise, the royal icing will run off of the side of the cookie.
If you are in need of a recipe, my favorite classic sugar cookie recipe is here! Follow the instructions to make these cookies, and then return to this page for all of the decorating instructions.
I also have some other fun sugar cookie recipes that will work perfectly for royal icing decorating:
What you will need to Decorate Football Sugar Cookies:
- Sugar Cookies (try this recipe!)
- Royal Icing (instructions and recipe below)
- Gel Food Coloring
- Tipless Piping Bags
- Cookie Scribe (or toothpick)
- Transfer Sheet and Printer
- Wax Paper
Royal Icing Recipe
Ingredients
- 4 Cups Powdered Sugar
- 2 tablespoon Meringue Powder
- ¼ cup Water (plus a 1-3 extra tablespoons)
- 1 teaspoon Clear Vanilla Extract (optional)
- ½ tablespoon Corn Syrup
Royal Icing Instructions
To make your royal icing, start by sifting your powdered sugar to ensure there are no lumps, measure, and pour into a large mixing bowl. Add the meringue powder and ¼ cup of water. Beat on low speed with a hand mixer for about 30 seconds.
At this point, the mixture will be pretty clumpy. If you are opting to add either clear vanilla extract or corn syrup, do so at this time. Add another tablespoon of water and beat on low until fully incorporated. Continue to add water very slowly (no more than a tablespoon at a time). Beat until the icing is smooth and looks very white. For consistency, you want the icing to be on the thicker side to start (you will thin it out when you color the icing).
Cover your icing with a wet paper towel while you work on dying the icing. If you do not, the icing will start to dry and crust over.
To get a VERY detailed description of all the best tips and tricks for Royal Icing, check out my full recipe here.
If you are new to royal icing, you can read my Ultimate Guide to Royal Icing Decorating.
Coloring Your Royal Icing
Take about 2 tablespoons of the icing and place in a small bowl. You will be using this for the white lines on the football. Add white gel food coloring to get a brighter sharper white. You will need to get this icing to a detail consistency, similar to that of toothpaste. If the icing is too thick, add water a drop at a time (literally a drop, with only a few tablespoons of icing, you can quickly make this too thin). Once you achieve the toothpaste consistency, add the white royal icing to a piping bag, tie, and set aside.
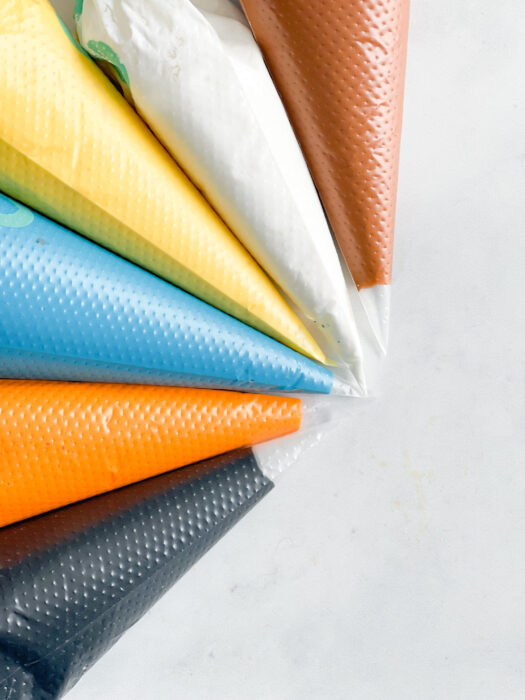
Now take about ¼ cup of icing from the large bowl and add to a small bowl. This will be used for the footballs. Add brown gel food coloring (I used Americolor Warm Brown and a touch of Espresso) and gently stir until you achieve the color you desire. Now add water slowly, about ⅛ to ¼ teaspoon at a time. You will want this icing consistency to be a very thick flood/outline consistency. When you lift up some icing and drizzle outback into the bowl, it will take around 25 seconds to dissolve smoothly back into the bowl of icing. It will also be similar to that of a very thick honey.
The remainder of the icing will be used for the base layer of the cookie. You will need at least 2 colors for the base royal icing layer of your cookie. I am going to do 4 colors, 2 colors from each team. Since we have the Bengals and the Rams in the Super Bowl this year, I am going to do an Orange/Black base on half of the cookies and a Yellow/Blue base on the other half of these football sugar cookies.
Divide the remainder into 2 portions (or 4 if you are opting to do more colors). The consistency of these icing colors should be flood consistency, taking about 15 seconds to dissolve back into itself (similar in consistency to honey).
PRO TIP: To save dirty bowls, I always start with the lightest color, and then you can use the same bowl again for the next darker color. For the colors I am using, I will mix them all in the same bowl starting with yellow, orange, blue, and then black.
Once all of your colors are mixed, add them to piping bags and set them aside.
Football Royal Icing Transfers
What are Royal Icing Transfers?
Royal Icing Transfers are edible decorations created using royal icing. They are typically made on wax paper where they will dry. Once they have hardened they are carefully removed from the wax paper for use in cookie or cake decorating.
For these football sugar cookies, I decided to make the footballs themselves as transfers. This way, each football will be a consistent size and shape. Also, you would normally have to wait until the base layer is fully dry to pipe and flood a football on top. This way you can just pop your football transfer straight onto the freshly decorated cookie!
You can also use these transfers to top off many other desserts for your party as well!

How to Create Royal Icing Footballs
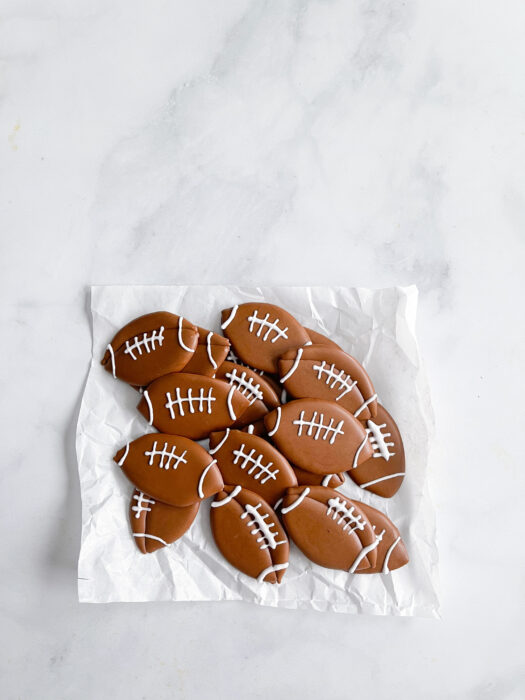
Print out the sheet of footballs below. I have made these to fit a circle cookie cutter that is 2.5” in size.
Take out a flat cookie tray, place the printout of footballs onto that tray, and cover that paper with a piece of wax paper. Outline the football with your brown icing and then fill in the center of that outline. Use a cookie scribe (or toothpick) to even out the royal icing.

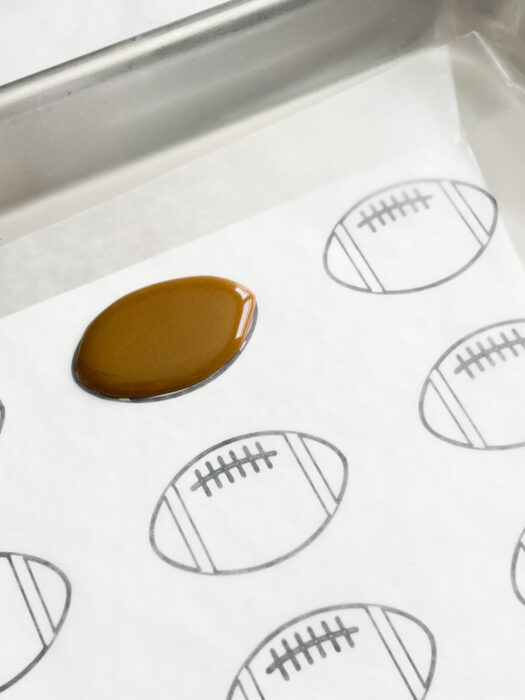
If you want a more detailed football trace the top half of each football with your brown royal icing and fill in the center. Wait until the top of the football starts to dry and a slight crust starts to form, before tracing and filling in the bottom half of the football.
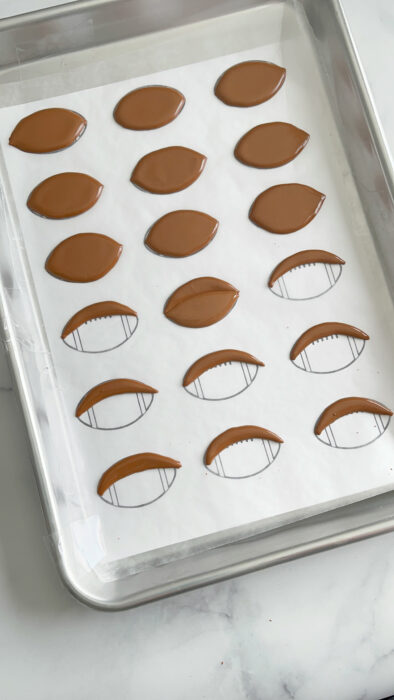
Once the top of the footballs have started to dry and are no longer ‘shiny’, pipe a thin line across the middle of the football with your white detail royal icing. Create a few hash marks across that line. Let the royal icing transfers dry completely. Add one white line down on each side of the football as well.

Drying time may vary depending on your climate/humidity, but on average around 8 hours is more than enough. You can probably cut down this drying time by letting the transfer dry in front of a fan.
PRO TIP: If you use a fan for the drying process, make sure to tape down the wax paper so it doesn’t go flying and destroy your little footballs!
When your football royal icing transfers are completely dry, carefully remove them from the wax paper.
Decorating the Super Bowl Football Sugar Cookies
Now that your royal icing transfers are complete, time to decorate the base layers of the cookies! Take the lighter color out of the two corresponding colors and outline the cookie. With no specific pattern, add blobs of both colors throughout the cookie.
Use a cookie scribe or toothpick to swirl together the two colors. You can experiment with how you pull the scribe through the icing, creating different patterns and designs. As soon as you finish adding the flood royal icing to the cookie, swirl immediately. If you wait a few minutes, you risk the icing starting to crust over, and then the cookie will not dry smooth.
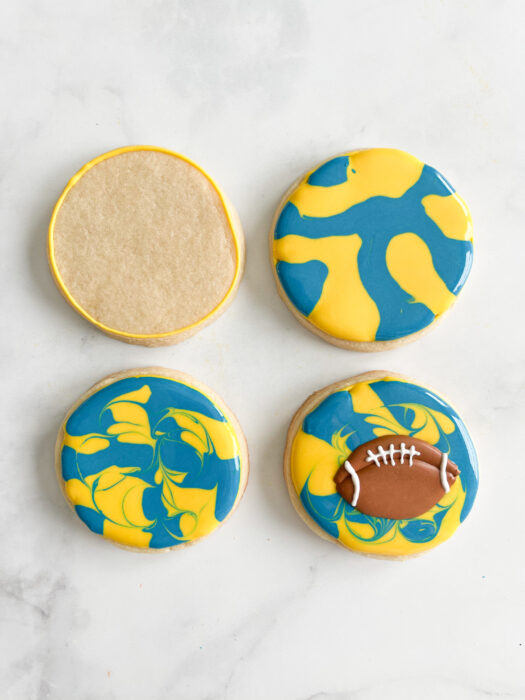
The best part about these is there is no ‘right way’ to create them. As soon as the royal icing is added, add your football transfer and let the cookies dry completely. This will take approximately 8 hours. However, it could be more or less time depending on your climate and humidity levels. Let dry in front of a fan to speed up the process!
Storing Football Sugar Cookies
To store, place in an airtight container for up to 5 days. Make sure to put a piece of parchment paper between each layer of cookies if you are stacking them in the container.
If you want to store them for a longer period of time, package them in an airtight container the same way, and store them for up to 3 months in the freezer. When you want to eat them, remove them from the freezer and let them come to room temperature completely before opening the container.


