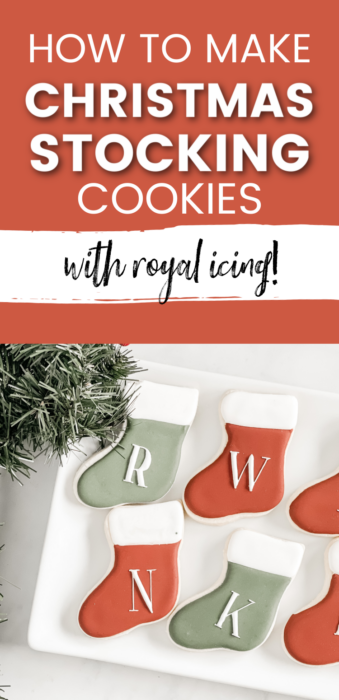
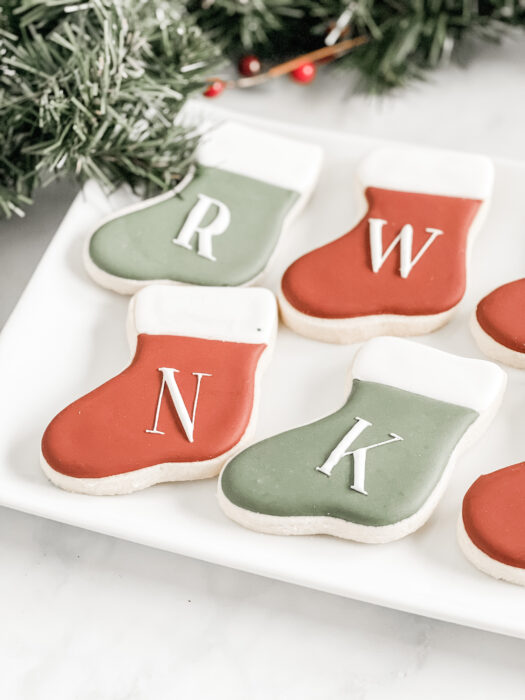
Christmas time is my favorite time of the year to decorate sugar cookies and share them with friends and family! Christmas stockings are so fun to decorate because there are an unlimited amount of ways you can decorate them. These monogram Christmas stocking sugar cookies are the perfect place settings for Christmas dinner or a topper for a gift.
Disclaimer: This post may contain affiliate links, meaning I may get a small commission if you decide to make a purchase through my links at no cost to you.
How to Decorate Cookies with Royal Icing
This article will give you a step-by-step guide on decorating these cute little monogram stockings. Using the tissue paper method, you can get nice even, and consistent lettering.
Recipes You Will Need
Supplies for Christmas Stocking Cookies
- Stocking Cookie Cutter
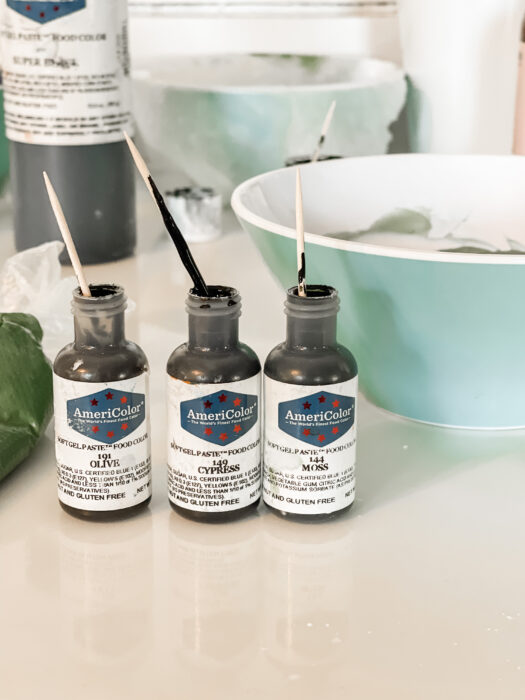
- Americolor Gel Paste (Red, Black, Cypress, Moss, Olive, White)
- Piping Bags
- Cookie Scribe
- Edible Marker Thin Tip
- Tissue Paper
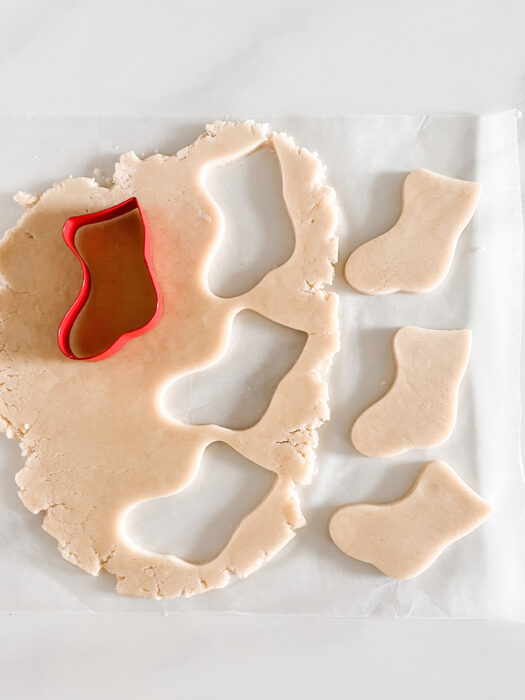
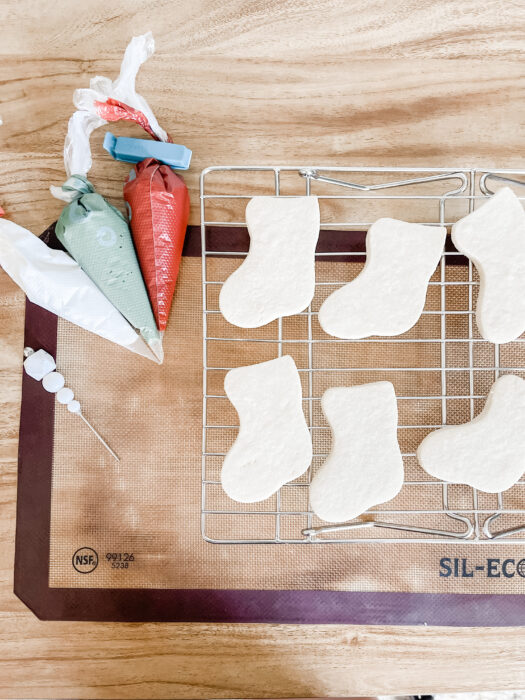
Bake Sugar Cookies
Using a sugar cookie recipe that will not rise or spread, bake your sugar cookies and cut out your stocking cookies. If you don’t have a recipe, try out my no spread cut out sugar cookies or these cookies and cream sugar cookies.
Making Royal Icing for Stocking Cookies
For these cookies, you will need flood icing and detail icing. You can use whatever colors you prefer, but here are the colors and formulas I used. For instructions on how to make royal icing, here is my 3 ingredient Royal Icing Recipe! Once you make and dye your royal icing, fill piping bags with each color and consistency.
Icing Consistencies
Flood Icing
- Dark Red (red + small amount of black)
- Dark Green (cypress + small amount of olive + small amount of moss)
- White (bright white)
Detail Icing
- White (bright white)
You can read all about royal icing consistencies and some of my favorite tools and supplies on my Ultimate Guide for Royal Icing Cookies. For these cookies, make the flood royal icing a 10-15 second flood. The detail icing should be almost a toothpaste consistency, where it is thick, but if picked up with a spatula, the peak will curl down.
Icing Colors
For these cookie designs, I used Americolor Soft Gel Paste.
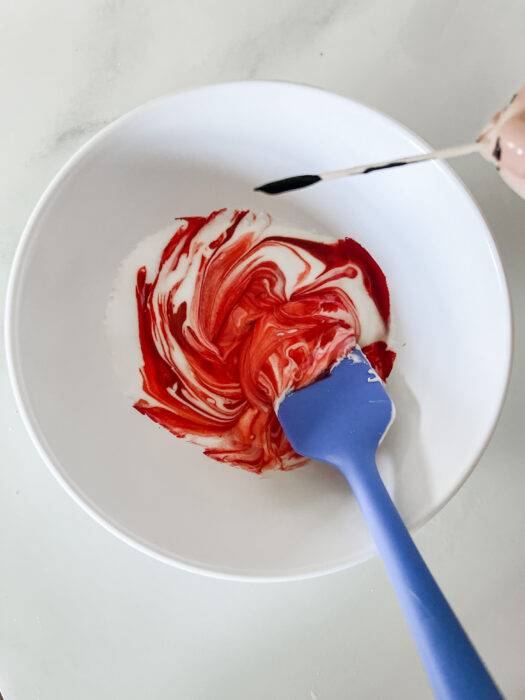
Red Icing
To create the dark red icing, you will use mostly AmeriColor Red. Mix in the red icing first and then using a toothpick, add very small dots of black icing. Only add one or two dots at a time. After one or two dots of black, mix well. Cover the bowl of icing with a wet paper towel and let sit for 30 minutes to 1 hour. As the icing sits the color will begin to deepen.
Green Icing
The green icing is primarily AmeriColor Cypress. MIx primary cypress and using the toothpick method, add small dots of moss and olive until you get the desired color. As with the red, the green will deepen as sits.
White Icing
Even though your icing looks white once made, to get the bright/sharp white, you will need to add white food dye.
Decorating your Christmas Stocking Sugar Cookies
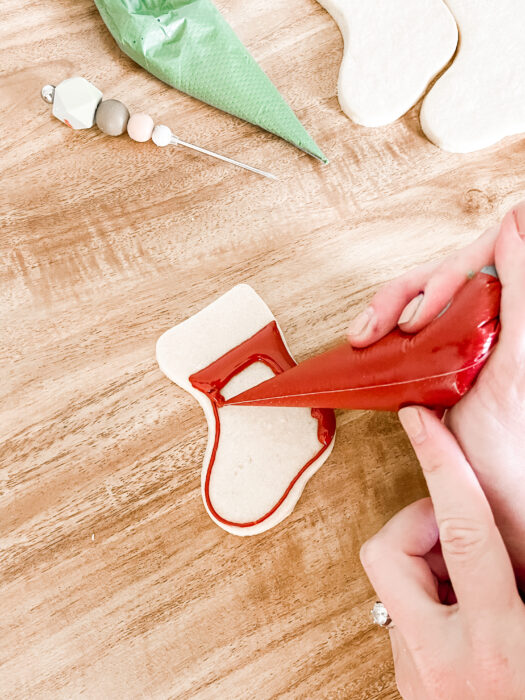
Decorate the bases of the cookies with green and red icing. Outline with the flood and immediately fill in the outline starting from the outside and working your way in. Let the royal icing dry.
For best results, let the cookies dry in front of a fan (I use my window air conditioner). Air circulation around the cookies helps them to dry quicker and more evenly. Let this layer dry completely, this will take around 8 hours depending on your climate. The more humid, the longer it takes to dry.
Adding Your Monogram to Stocking Sugar Cookie
If you have a projector, simply project your monogram onto the completely dried base of the stocking cookie. If you don't have a projector, you can use these templates below or using Microsoft Word or text program, you can make your own. Print out monograms in the size that will best fit your stocking cookie.
Place a small piece of tissue paper on top of the monogram you would like to use. Using your edible pen, trace that monogram on the piece of tissue paper. Place that piece of tissue paper on the cookie and align it to where you want your monogram. Now, trace the tissue paper with the edible marker and this will leave a faint line on your cookie.
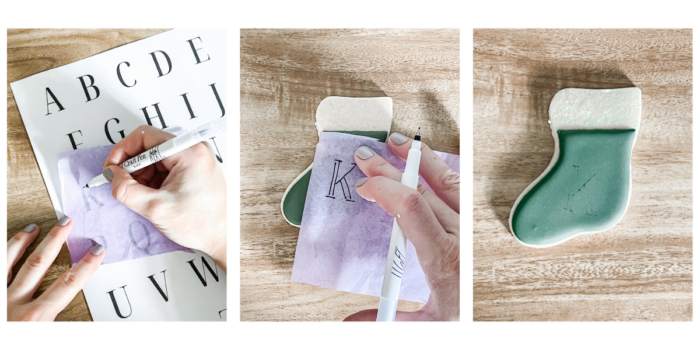
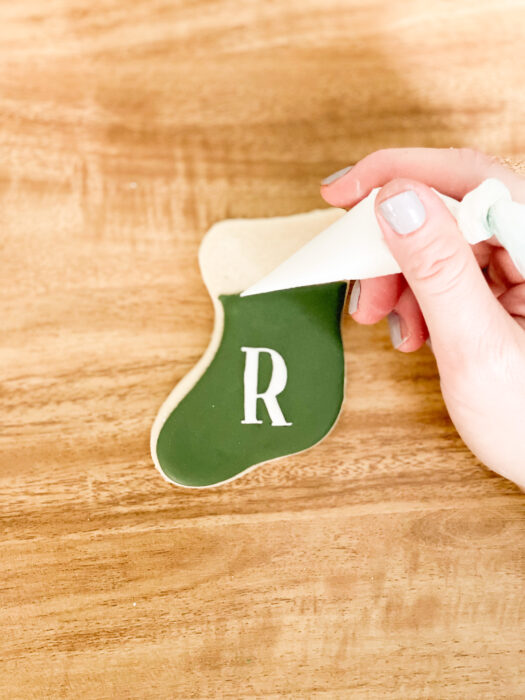
Use the detail consistency white icing, trace the lines on your cookie. Let cookies dry for several hours. Since the last step was only using detail consistency (and not flood), the monogram should completely dry in a few hours (or less). I can’t give an exact time because it may vary based on your weather and humidity levels. The more humid, the more time it takes to dry.
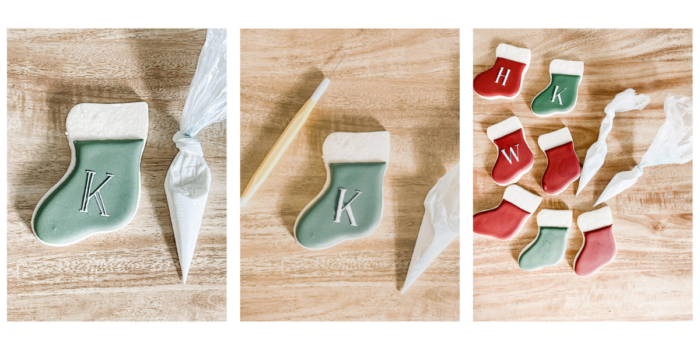
Filling in the Top of the Christmas Stocking Cookies
Fill the top portion of the stocking with the thicker detail white icing. Outline and then fill in the center. If you want to add a little texture, you can fill in the top white portion of the Christmas stocking sugar cookie with white Nonpareils. If you add the nonpareils, make sure the monogram on the stocking is not tacky at all or they will stick to that portion as well. Let the white icing dry completely.
At this point, let your stocking Christmas cookies dry completely. This will take at least 8 hours. I typically let them dry overnight to ensure they are completely set.
If you are using these at Christmas gifts, you can use these adorable free printable tags! Check out more royal icing tutorials such as my royal icing guide, how to dry royal icing quickly, how to get royal icing to dry shiny, and how to transport decorated cookies!
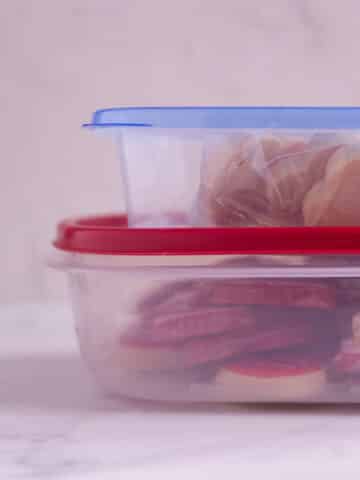
Storaging Christmas Stocking Sugar Cookies
Keep these cookies in an airtight container for 5-7 days. You can freeze them for up to 3 months. To do so, place cookies in an airtight container, and between each layer place a piece of parchment paper. To defrost, remove from the freezer and let cookies come to room temperature before opening the container. For more information on storage, check out my post on how to store decorated cookies and royal icing!