Even though Halloween has been crowned the official holiday of candy, I really think Easter has been grossly underrated on this front. There are so many delicious Easter treats, including one of my all-time favorites, Peeps! These adorable Easter bunny sugar cookies are really easy to make and will be the perfect special touch for your Easter dessert table! I'll walk you through the step-by-step instructions to make your own adorable Easter Bunny Peep cookies.

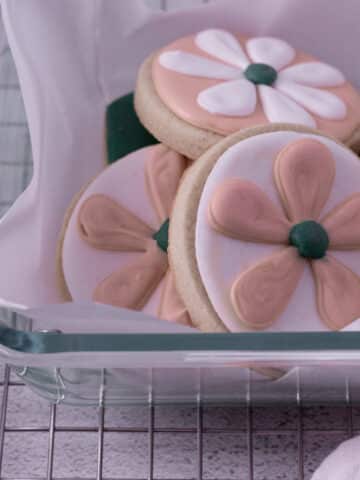
These bunny Easter sugar cookies are decorated with royal icing. This type of icing allows you to decorate cookies with great detail and it dries hard to the touch. If you have never used royal icing, start by checking out my Ultimate Guide to Royal Icing for Beginners. For other spring cookies, check out my Groovy Colorful Flower Sugar Cookies.
Disclaimer: This post may contain affiliate links, meaning I may get a small commission if you decide to make a purchase through my links at no cost to you.
Jump to:
Supplies You Will Need:

- Unfrosted Cookies: Start by making your favorite sugar cookie recipe. Make sure that the recipe yields cookies that are flat with sharp edges, as this is ideal for royal icing decorating. If you don't have a recipe, you can try my classic sugar cookie recipe. I also have recipes for lemon cut-out cookies, almond cut-out cookies, and chocolate chip cookie cut-outs too.
- Royal Icing: You will need a royal icing recipe. If you don't have one already, check out my simple royal icing recipe with meringue powder.
- Bunny-Shaped Cookie Cutter: To get these to resemble actual Peeps, you will need a bunny cookie cutter in that shape. During the Easter season, you may be able to find them in craft stores. You can also find them here on Amazon or give Etsy a try!
- Food Coloring: I recommend using gel food coloring for dying royal icing. But make sure whatever dye you use is water-based, and not oil. I used Wilton Color Right Food Coloring Set in pink, blue, and yellow. These are very concentrated colors, which allow me to achieve very bright and vibrant shades. You may be able to find these individually packaged at a craft store like Jo-Ann's or Michaels. You will also need a small amount of brown or black royal icing for the eyes.
- Piping Bags: An essential tool for royal icing decorating. I prefer using tipless bags (my favorite ones are from Grunderfully Delicious) because you can simply snip off the tip of the bag and decorate without dealing with the metal piping tips. If you like to use piping tips, you'll need a size 1 round tip for the eyes and mouth and a 2-3 round tip for the flooding.
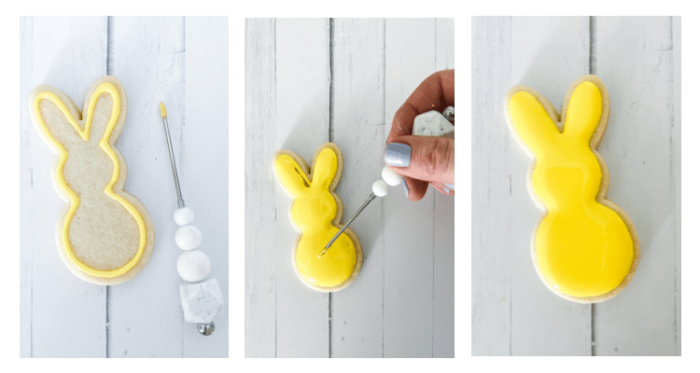
- Cookie Scribe: A tool that allows you to spread out the royal icing evenly across the top of the cookie. If you don’t have one, a toothpick will work fine too!
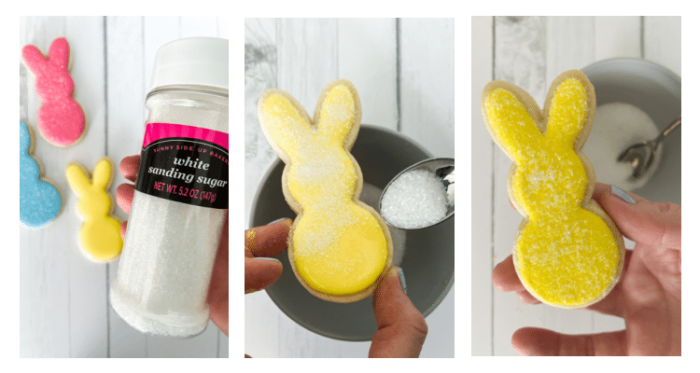
- Sanding Sugar: Perfect for getting the sugary coating on the Peeps cookie.
If you are new to royal icing decorating, check out my Ultimate Guide to Royal Icing Cookie Decorating for Beginners. This will outline everything you know to get started. I also have some other posts about the best cookie decorating supplies, how to make royal icing shiny, and how to dry royal icing fast!
Baking the Cookies
Once you find the sugar cookie recipe you are going to use, follow the instructions as stated in your recipe. For royal icing cookie decorating, I recommend rolling out the sugar cookie dough to around ¼" to ⅜". Thicker cookies have a little more support and will be less likely to break and ruin your decorating.
To get level cookies, I like to use this rolling pin that has measuring rings on the side. Alternatively, you can use dough sticks which you place outside of the dough you are rolling, which allows the dough to stay level.
Make sure your cookies are completely cool before decorating with royal icing. I prefer to bake the cookies the night before I plan to decorate them.
Prepare the Royal Icing
For these adorable Easter Bunny cookies, I used four royal icing colors: blue, pink, yellow, and dark brown. However, get creative by using other colors or even pastel shades.
Here is the exact icing I used (keep reading below to learn about how to make each color):
- Blue: 10-15 second flood consistency (for body of bunny)
- Pink: 10-15 second flood consistency (for body of bunny)
- Yellow: 10-15 second flood consistency (for body of bunny)
- Dark Brown: detail consistency (for eyes and mouth)
Icing for Eyes and Mouth
After you make your royal icing recipe, remove a tablespoon of icing and place it in a small separate bowl. Add a small drop of your brown or black food coloring and mix until combined. For the eyes, you will want a detail consistency icing. This means the icing isn't completely stiff, but it has very little movement. Think like the consistency of toothpaste.
TIP: If your icing is too thick add a few drops of water until you get the right consistency. If it's too thin, add a sprinkle of powdered sugar until you get the right consistency.
Icing for Body of Bunny
With the remainder of the icing, you will want to get to a thick flood icing, about 10-15 second icing. This means that if you pick up some icing with a spoon and drizzle it back into the bowl, it will take 10-15 seconds for it to settle back into the rest of the icing. A similar consistency would be a thick honey.
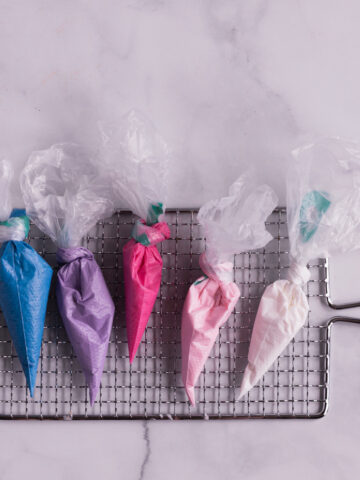
Once you get the consistency of the remaining icing to be 10-15 seconds, divide it into three bowls (or into the same amount of bowls as icing colors you are using). Add food coloring to each bowl and mix well. Add the colored icing to a piping bag.
ROYAL ICING TIP: Usually, I like to use a detail consistency icing to outline my cookie and then fill in the outline with a flood consistency icing. Using a detail consistency for an outline is necessary when the cookie design is very detailed. However, since these bunny cookies only have a single color in the background, it saves a step to use a thicker flood for both outlining and flooding the cookie!
How to Decorate Cookies
If using tipless piping bags, cut off a very small piece of the tip of the bag. Always cut a smaller piece than you think - you can always cut more but not less. The pink, yellow, and blue piping bags will need a larger hole than they brown/black icing. If you are using piping tips, fit the bag with a size 2 or 3 round tip.
Outline the Peep bunny cookie using the 10-15 second consistency royal icing in pink, blue, or yellow. Make sure not to outline the cookie too close to the edges so the icing does not run off. Fill in the body using the same icing as the outline. Spread icing using a cookie scribe or toothpick.
Once the Peep cookie has been fully flooded, carefully pick it up and hold it over the sanding sugar bowl. Sprinkle the white sanding sugar over the cookie using a small spoon. Generously coat the cookie and make sure you get the edges of the royal icing covered. Shake off excess sugar back into the bowl.
Continue decorating the remainder of the cookies with the royal icing and sanding sugar.
Allow the cookies to set for about 10-15 minutes. At this point, you can add your eyes and mouth.
Make 3 dots in a triangle shape in the middle of the face for the two eyes and the mouth.
TIP: As you are piping your eyes/mouth, gently press the tip of the piping bag onto the base of the cookie. You want to make sure the eyes/mouth are connected to the base icing, not only sitting on top of the sanding sugar. If you only pipe the details on top of the sanding sugar, they will most likely pop off once the icing is dry.
Allow the cookies to set on a wire rack/cooling rack, cookie sheet, or parchment paper for about 8 hours (I typically let the cookie sit out overnight to ensure the royal icing fully hardens).

Storage
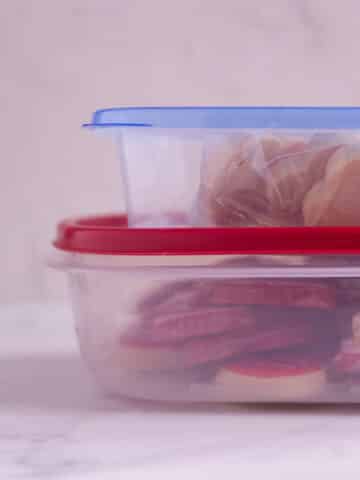
Once the royal icing is completely dry, you can store the decorated cookies in an airtight container. I would suggest that you don't stack them too high (no more than 2-3 rows high) to help prevent the eyes and mouth of the Peeps from popping off. These are my favorite containers for storing royal icing cookies because they have a nice large surface area.
You can keep them in an airtight container for 5-7 days. They can be frozen for up to 3 months. To defrost, remove the cookies from the freezer and allow them to come to room temperature in the container. Do not open the container until the cookies are fully thawed!
I hope you enjoy these cute little rabbit cookies and Happy Easter!!!
Royal Icing
Some of my favorite tips and tricks for royal icing cookie decorating:
Related
More royal icing decorating tutorials:
